> ## Documentation Index
> Fetch the complete documentation index at: https://v3.captaindata.com/llms.txt
> Use this file to discover all available pages before exploring further.
# Launch a Workflow with Zapier
> Step-by-step guide to scheduling Captain Data workflows using Zapier for seamless automation.
Let’s get your workflows scheduled in Captain Data using **Zapier**! If you’re looking to automate tasks and streamline your processes, follow this step-by-step guide. It’s simple, flexible, and ensures smooth execution with fewer errors. 💪
What we’ll cover:
1. **Custom Request Setup** using the POST method.
2. **Testing** your setup to make sure everything’s working perfectly.
## Setting Up a Custom Request (POST)
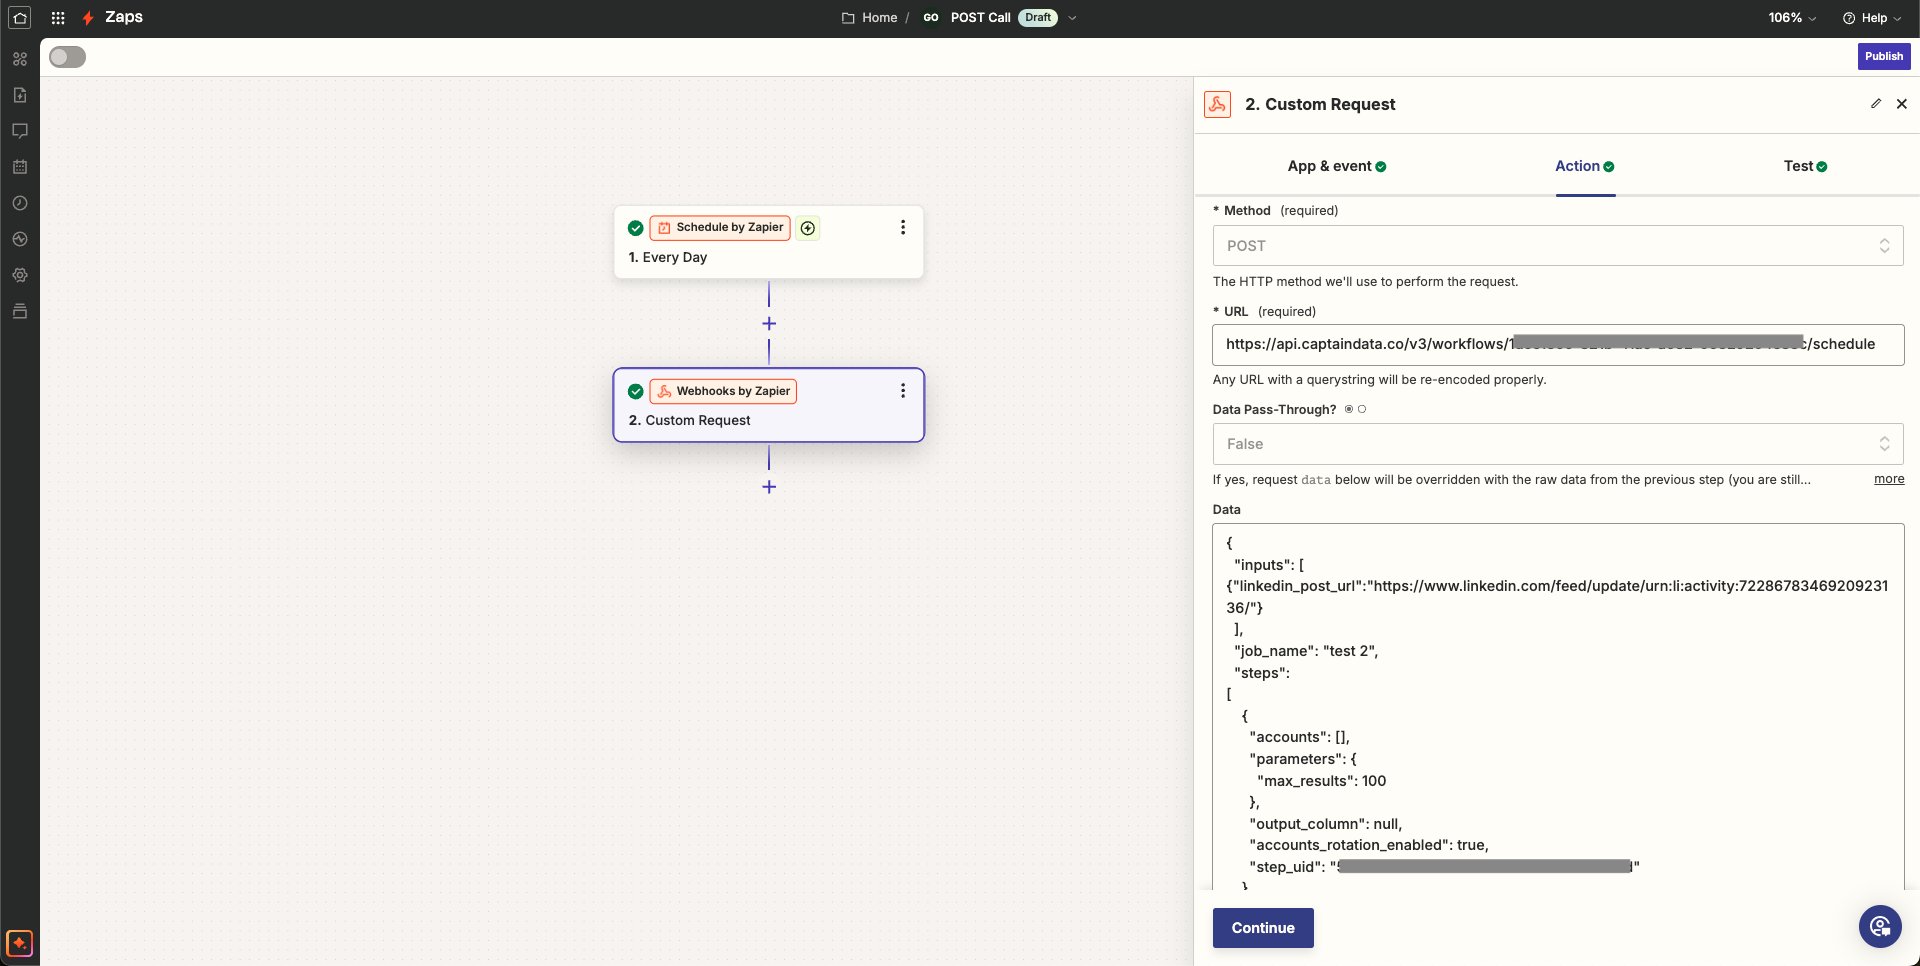
To send data to Captain Data via Zapier, using the **Custom Request** webhook step is the way to go. It allows you to send multiple key-value pairs in a more flexible way compared to the standard POST Webhook.
* **Method**: POST
* **URL**: Use the following structure to send the request:
```bash
https://api.captaindata.co/v3/workflows/{workflow_uid}/schedule
```
The fastest way to find the **Workflow ID** is to look directly in your
browser.
1. Go to the **API tab** of your workflow and click **View Body To Schedule**.
2. Copy/paste the data structure into Zapier.
3. Modify the `inputs` if needed and change the `job_name` for clarity.
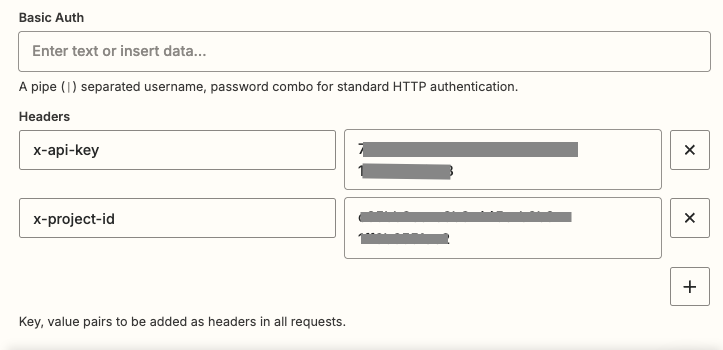
 Regarding Basic Auth and Headers:
* Basic Auth can be left blank, but make sure to include necessary headers.
* You can find header information in the **API Playground** of your workflow.
Regarding Basic Auth and Headers:
* Basic Auth can be left blank, but make sure to include necessary headers.
* You can find header information in the **API Playground** of your workflow.
 ## Running a Test
Once you’ve set everything up, it’s time to run a **test** and check if the data configuration was successful.
What to Look For:
* If the test runs without errors, Captain Data has successfully received your request and launched the workflow.
## Running a Test
Once you’ve set everything up, it’s time to run a **test** and check if the data configuration was successful.
What to Look For:
* If the test runs without errors, Captain Data has successfully received your request and launched the workflow.
 * You can double-check by going to the **Rob History** in Captain Data to see if the workflow has been initiated correctly.
🎉 **And that’s it!** With these simple steps, you can now automate the scheduling of workflows in Captain Data via Zapier with ease. If you have any questions, feel free to reach out—happy automating! ⚡
* You can double-check by going to the **Rob History** in Captain Data to see if the workflow has been initiated correctly.
🎉 **And that’s it!** With these simple steps, you can now automate the scheduling of workflows in Captain Data via Zapier with ease. If you have any questions, feel free to reach out—happy automating! ⚡