

- Custom Request Setup using the POST method.
- Testing your setup to make sure everything’s working perfectly.
Setting Up a Custom Request (POST)
To send data to Captain Data via Zapier, using the Custom Request webhook step is the way to go. It allows you to send multiple key-value pairs in a more flexible way compared to the standard POST Webhook.- Method: POST
- URL: Use the following structure to send the request:
- Go to the API tab of your workflow and click View Body To Schedule.
- Copy/paste the data structure into Zapier.
- Modify the
inputsif needed and change thejob_namefor clarity.
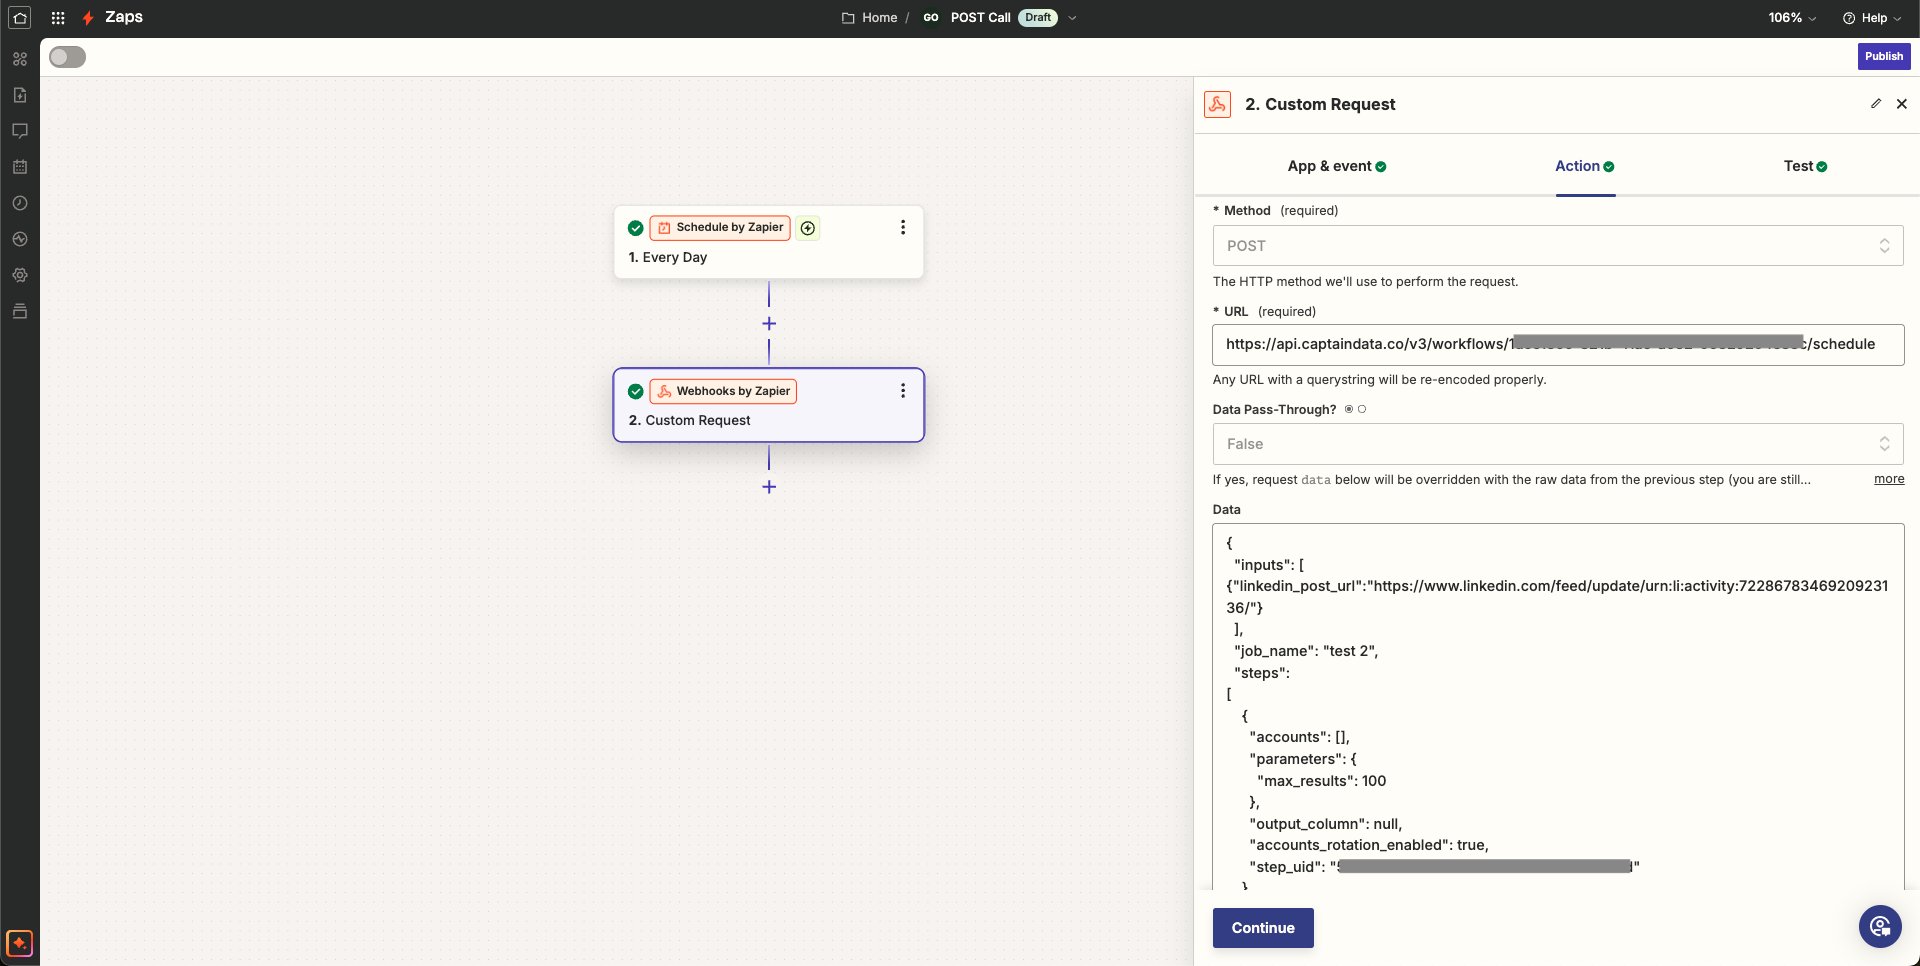
Data Setup
- Basic Auth can be left blank, but make sure to include necessary headers.
- You can find header information in the API Playground of your workflow.
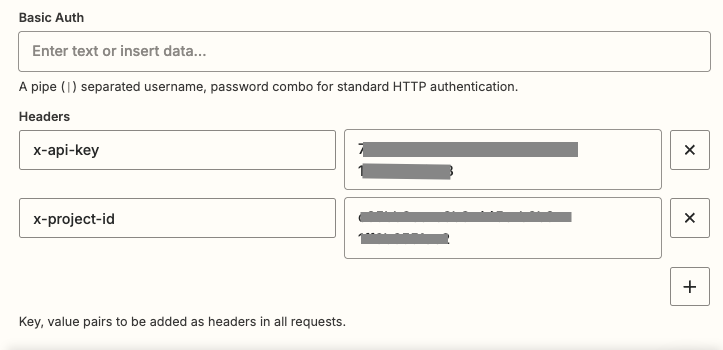
Zapier Basic Auth
Running a Test
Once you’ve set everything up, it’s time to run a test and check if the data configuration was successful. What to Look For:- If the test runs without errors, Captain Data has successfully received your request and launched the workflow.

Zapier Preview Test
- You can double-check by going to the Rob History in Captain Data to see if the workflow has been initiated correctly.